Setting up AdGuard Home: first homelab service
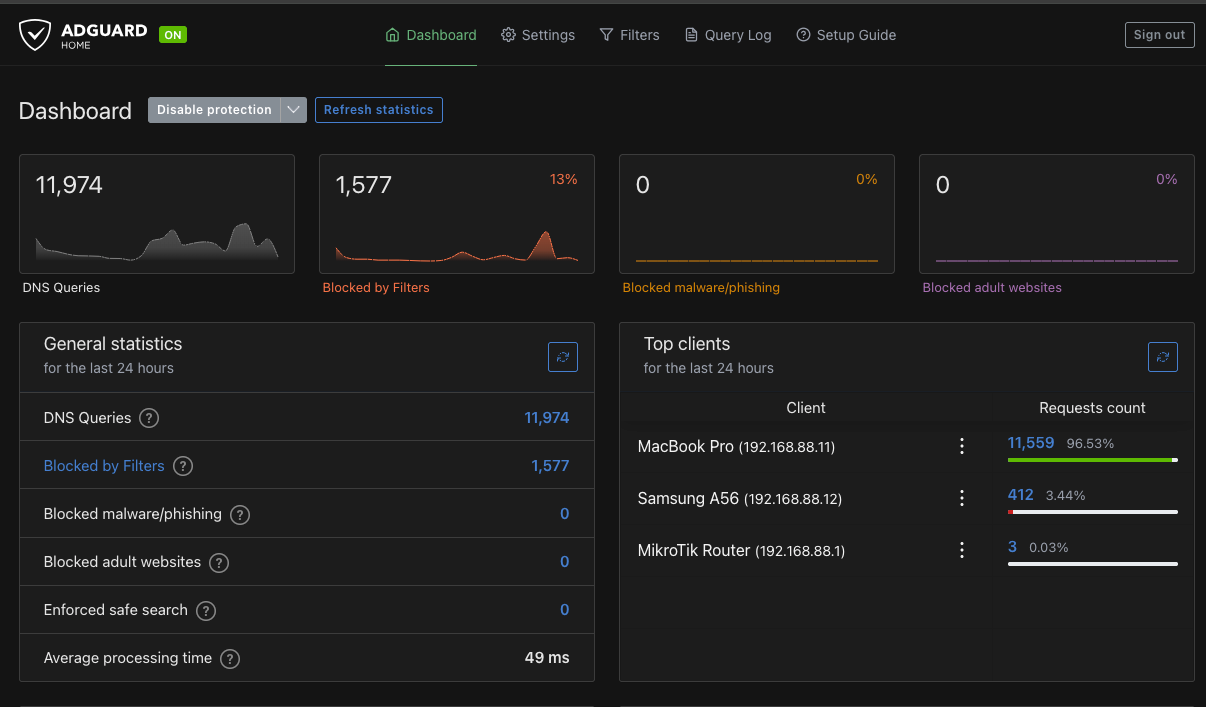
Now that we've got a homelab network and a functioning machine, the time has come to deploy our first service. A network-wide ad-blocker is a common choice, as it's both useful and easy.
Move from a VPS to the homelab
So far, I've been using Pi-hole deployed on a VPS, into which I connected my devices via Wireguard. It is quite a good solution, and worked seamlessly on my MacBook and my Android smartphone. However, it requires an installation and setup of Wireguard, no matter where I am. Each new device which I wanted to use Pi-Hole with needed to have Wireguard configured first, and also to be added to the Wireguard setup on the VPS server. This was not particularly convenient. On top of this, I failed to properly set Wireguard up on my Windows 11 laptop - no matter what I did, the connection to the VPS just refused to appear.
A network-wide solution is incomparably better, as it automatically accommodates all connected devices, without any setup. It is also completely client- and OS-agnostic.
Pi-hole vs. Adguard Home
For the homelab, I decided on AdGuard Home rather than Pi-Hole for one simple reason: I wanted to try something I don't know yet. It quickly turned out that AdGuard Home has some handy features, such as blocking particular services, e.g. dating, gambling, social etc. Another reason is that it is much lighter: it's just a Go binary, unlike Pi-hole with its stack of dependencies.
First steps
Our docker-compose.yml file may be as simple as this:
services:
  adguardhome:
    image: adguard/adguardhome
    container_name: adguardhome
    restart: unless-stopped
    volumes:
      - ./workdir:/opt/adguardhome/work
      - ./confdir:/opt/adguardhome/conf
    ports:
      - "53:53/tcp"
      - "53:53/udp"
      - "80:80/tcp"
      - "3000:3000/tcp"
      - "8080:8080/tcp"
    logging:
      driver: "json-file"
      options:
        max-size: "10m"
        max-file: "3"
Running it in a detached state with docker compose up -d sufficed to get it going. But no ad-blocking was taking place at that point in time: we also need to set the router to use the AdGuard machine as a DNS server. We can achieve on a Mikrotik hAP lite router in the following way:
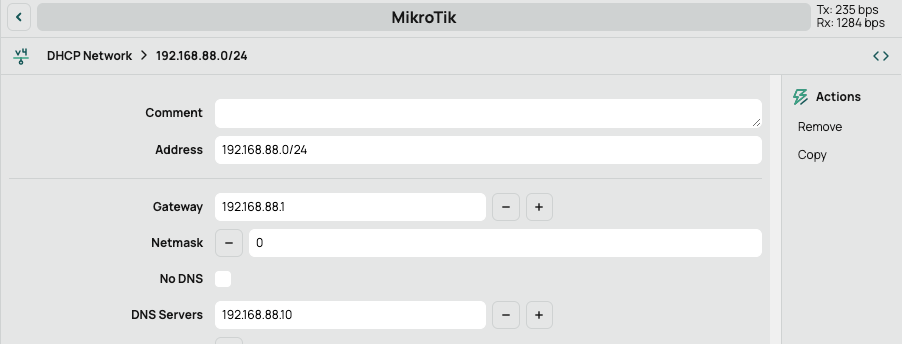
1) Log into the router via the WebFig interface
2) Go to IP -> DHCP server
3) Click on the 'Networks' tab at the top
4) Click on your local network entry (usually 192.168.88.0/24 on MikroTik)
5) In the DNS Servers field, replace any existing IPs (such as 1.1.1.1, 8.8.8.8) with the static IP address of the AdGuard Home computer (in my case it is 192.168.88.10)
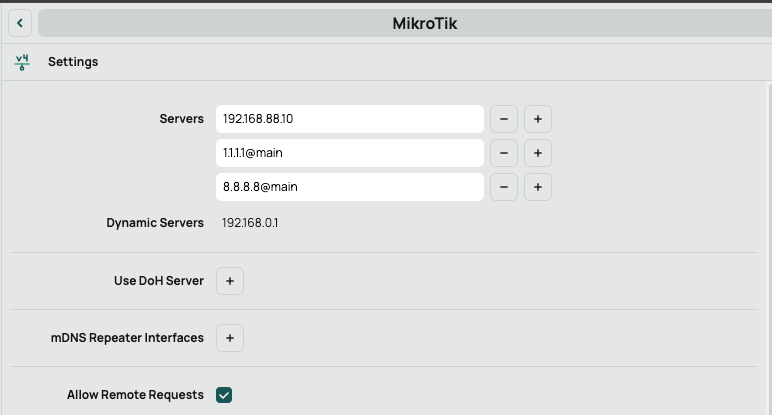
Optionally, it is also a good idea to set AdGuard Home as the default DNS resolver for the router itself. To do this, go to IP -> DNS, and under `Servers` put the Adguard computer IP in the first available slot.
That's it. Now when we reconnect all devices on the network, they will start using the AdGuard machine as the default DNS. How cool is that?
Now, you can go the AdGuard Home web interface and set friendly names for all of the devices on the network (as long as they have static IPs) so that you can clearly see which device connects to what:
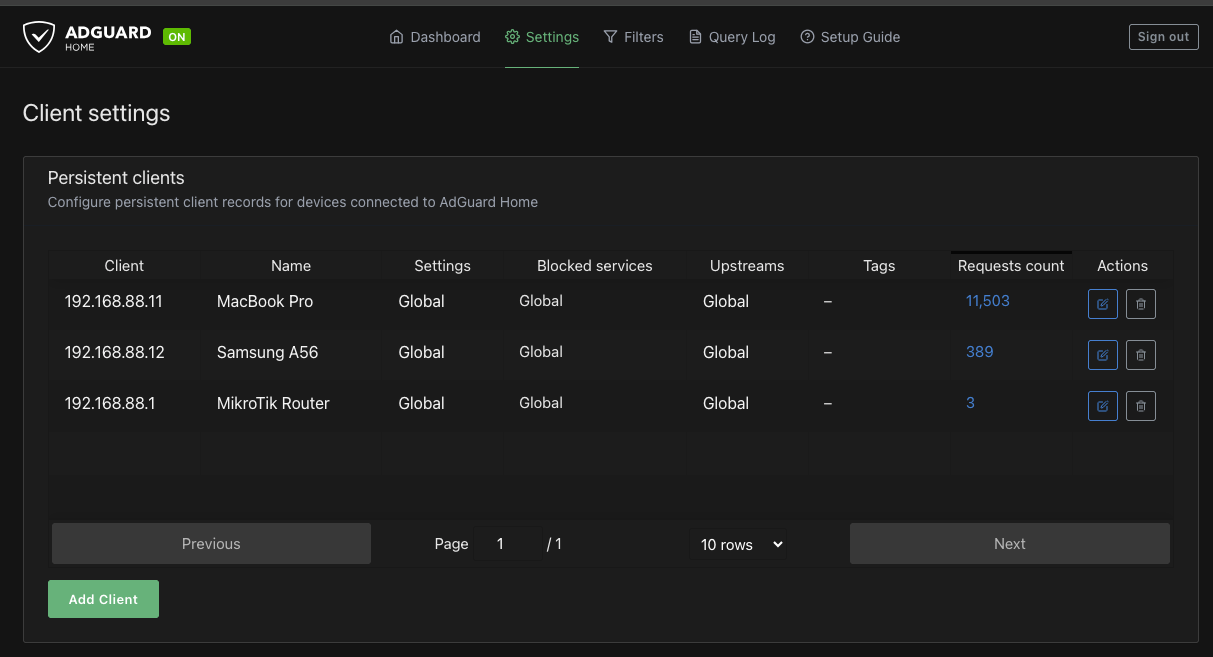
We are all set! The first homelab service is alive and kicking. I hope it's just the beginning... 🚀
Comments ()